This era in history may be remembered as the "Peak Age", a brief time when nearly all materials used to power and create our society reach the maximum extraction and production potential. Past this point, all of these resources become increasingly difficult to extract until they are no longer economically viable resources to be using. There are hundreds of examples of resources, currently embedded in our industrial society, which have reached their peak in the 50 years surrounding 2010, but the one which will most impact our society is petroleum.

The goal of living for 100 days without oil is to understand the extent of our dependance on oil in American society today. Specifically, how it will affect my life, as a 25 year-oil living in Minneapolis, MN. By using myself as a metric I can take a close and conscious look at where oil dependance occurs in all aspects of our daily lives : How we transport ourselves from one place to another, what we eat, how much waste we create, how water is cleaned and transported, where oil is used as; an energy resource, in conventional medicine and for hygiene and how oil affects how we entertain ourselves and communicate with others. By demonstrating how someone would be forced to live without using any oil resources, outlining both what the sacrifices will be as well as the benefits, we can can identify the many systems which will have to be re-designed in a world without cheap oil, and explore a new way of living in which we live in an energy balance.


(At the bottom of this page is a link to my version of a flow diagram of 'Where Petroleum Exists in Our Daily Lives' (using information from the Energy Information Administration-Annual Energy Review 2008 fig 5.0 Petroleum flow) click and zoom to enlarge)


Tuesday, September 28, 2010

DAY 43_MPG vs GPM (GARBAGE TRUCK ENERGY)

26 September 2010

How much energy is used to take out the trash?

I decided not to create any waste for this project mostly to see if it was possible, but have recently been looking into just how much energy it takes for a garbage truck to haul your trash away once a week.  A little background on Minneapolis (Hennepin County's) waste system from the city website(http://www.ci.minneapolis.mn.us/solid-waste/garbage.asp):

"None of your garbage goes into a landfill. City of Minneapolis garbage goes to the Hennepin Energy Resource Co. (HERC).
Located in downtown Minneapolis, the HERC facility uses mass burn technology to convert 365,000 tons of garbage a year into electricity that is sold to Xcel Energy, Inc."

This waste-to-energy facility is located in downtown Minneapolis, just 2.1 miles from my house.  While it may seem strange that Minneapolis burns all its waste near the most densely populated area of the city, this is a convenient location for the facility because it can more efficiently distribute the steam (heat energy) which is being created by HERC.  While the facility is extremely close to where I live, the main problem lies in how garbage gets there -garbage trucks.  As this article outlines (http://www.informinc.org/pr_ggt.php), garbage trucks have some serious fuel efficiency issues:

"The study found that garbage trucks are among the oldest, least fuel-efficient, and most polluting fleet vehicles in the United States:
  • There are more than twice as many garbage trucks in the US (179,000) as there are urban transit buses (82,600). The garbage truck fleet includes refuse and recycling collection vehicles as well as transfer trucks.
  • Forty-one percent of garbage trucks in use are more than 10 years old, nearing the end of their lifetime (12 to14 years), and performing at reduced efficiencies.
  • Garbage trucks use more fuel than any other type of vehicle – averaging 8,600 gallons per year – except for tractor-trailers and transit buses (which use 11,500 gallons and 10,800 gallons on average per year, respectively).
  • Garbage trucks in the US consume approximately 1 billion gallons of diesel fuel annually and get the lowest fuel efficiency (2.8 miles per gallon) of any vehicle type. Transit buses, single-unit heavy-duty trucks, and tractor-trailers get 2.9, 7.0, and 6.1 miles per gallon, respectively.
  • Diesel garbage trucks are a major source of air pollution, including smog-forming compounds, particulate matter, and toxic chemical constituents. While heavy-duty diesel-powered vehicles, including garbage trucks, make up only 7 percent of vehicles on the road, they contribute 69 percent of on-road fine particulate pollution and 40 percent of nitrogen oxide emissions.
  • Diesel garbage trucks are notoriously loud, generating noise levels of up to 100 decibels, which can cause serious hearing damage. Garbage truck operators, as well as those living along garbage truck routes, are affected by this noise.
Trying to crunch some numbers to get the # of gallons used to get from my house to the facility I realized that 2.8 miles per gallon = 2.8 gallons per mile.  Wait, why don't we use GPM instead of MPG?  Wouldn't it be interesting to be able to calculate exactly how many gallons of gas you use for each trip you take (or on a long vacation?).  It turns out, that the term MPG is an easy way to confuse consumers. according to this article (http://www.mpgillusion.com/2009/02/overveiw-of-gpm.html):

"MPG tricks people's perceptions. Replacing a car that gets 14 MPG with a car that gets 17 MPG saves as much gas for a given distance as replacing a car that gets 33 MPG with a car that gets 50 MPG (about 1 gallon per hundred miles--see this table). MPG obscures the value of removing the most inefficient cars. As the GPM table shows, a 14 to 20 MPG improvement saves twice as much gas as a 33 to 50 MPG improvement:"

MPG = miles per gallon
GPHM = gallons per hundred miles
MPGGPHM
1010
119
12.58
147
16.56
205
254
333
502
1001

More information on this at http://www.mpgillusion.com/"

A few conversions from wikipedia:

1 barrel of crude oil (42 gallons) makes 19.5 gallons of gasoline (other products are made from the barrel as well)

1 gallon of gasoline = 132 MJ = 36.6 kWh

Garbage trucks = 2.8 MPG = GPM
2.8 GPM x 2.1 (miles from my house to the HERC) = 5.88 gallons of gas

Multiplying 5.88 gallons of gas x 36.6 (kWh in a gallon of gasoline) I found that 215.2 kWh of energy are used in the garbage truck's 2.1 mile trip from my house to the waste facility. Whoala. A few comparisons, our house uses about 140 kWh of energy a month (that's 3 people).  Check your energy bill, this is probably pretty close to the amount of energy most small homes use in a whole month!  Granted, the truck makes many stops, so it isn't just MY garbage that is being picked up on the truck. For example, if the truck was on a 10 mile round-trip route which served 50 houses, the energy use per house would be 20.49 kWh (((2.8 MPG x10 miles)/50 houses) x 36.6 kWh)). I have had trouble finding data about garbage routes and number of homes served by each truck.  Updates on these numbers as I find more data...

But just for a moment I would like to consider how much energy would have to be dedicated for garbage hauling each day if I were to be using this service.  215.2 kWh divided by 7 days (garbage picked up once a week) = 30.7 kWh per day.  My energy budget is 5kWh/day.  (Again this number comes from my 'share' of the average solar energy that lands on my roof each day). This means that if I were to consider having garbage trucks haul my garbage away, and dedicated my ENTIRE energy budget towards it, I would only have enough energy to have garbage hauled every 43 days (215.2 kWh per load/5 kWh energy budget per day).  While there is no way I could dedicate my entire energy budget to garbage hauling, picking up garbage once a month doesn't actually seem that unreasonable.  As mentioned in earlier posts, while it is almost impossible to not accumulate ANY waste, it is certainly possible to minimize waste dramatically.  There are only a few items that I continually collect (milk lids, glass wine bottles, twisty ties).  Most of these things are actually recyclable (but I'm not recycling in this project due to energy requirements as well).  I won't have any problem collecting waste in the 14 gallon (2.5'x2'x2') plastic tub I am using now over the 100 days.  This means that I would really only need garbage to be picked up every 3 months or so. 

Below is a graphic describing the garbage energy use and flows (click to enlarge in a new window):

waste energy flows (click to enlarge)

Monday, September 27, 2010

DAY 42_CONTAINER GARDENING

25 September 2010

I finally feel like some of the stuff I planted might actually grow into food I can eat :)  I now have had greens growing for 3 weeks, planting a new bed each week.  Here are three bins of greens I have growing:

Collards (3 weeks old today):


Collards (2 weeks old today):


Arugula (1 week old today):


I also have some nice cilantro growing.  I have rosemary, basil and lemon balm also growing, but they are much smaller still. 


I've been reading some books on container gardening.  This has become a popular method of gardening lately as more people are trying to find ways to grow foods in small and indoor spaces.  A 2007 United Nations report concluded that over half of the world's population now lives in cities instead of rural areas.  This trend is likely to continue, and as it does, there will be more and more need to find ways to grow some of our own food in urban environments (our homes).  As petroleum decreases, and non-local foods become increasingly expensive, there will be more economic incentive to growing certain plants indoors to mimic their natural environments.  There are also health benefits to having growing plants around you.  E. O. Wilson most famously describes this phenomenon as the Biophilia Effect, "the connections that human beings subconsciously seek with the rest of life.” Basically, because we are natural beings ourselves, we have a deep-rooted affiliation with all that is natural.  Studies done in hospitals where a group of patients faced a brick wall while others had a view of nature, found that the patients who had a view of natural had faster recoveries.  By surrounding ourselves with plants, we can benefit from this phenomenon as well.

One advantage of growing plants indoors is that the space is already conditioned for our inhabitance.  Unlike a greenhouse, the space for growing doesn't require any extra energy for heating and cooling.  Unlike a garden, the indoor container garden can grow food all year round, regardless of season.  By having enough light, feeding and watering plants appropriately, the indoor environment can fool mother nature into thinking it is in its ideal climate all the time.   D.J.Herda's book, From Container to Kitchen outlines how to begin container gardening.   A few tips from Herda's book:

_Most plants need at least 6" of depth.  A good rule of thumb from Herda is that the foliage of the plant should not exceed this ratio (2/3 plant to 1/3 pot depth).  Pots can be found anywhere, old ice cream containers, coffee tins, mason jars, cut-in-half milk cartons. 

_Overwatering is the leading killer of indoor plants.  Because water in containers has no where to go it settles at the bottom of the container unless properly drained.  The bottom roots of the plant are where all nutrients are soaked up into the rest of the plant, and if this part of the plant is constantly too wet, it will being to rot and cause the plant to weaken, get disease, and possibly die.  A good rule of thumb: if the plants leaves are turning brown and crispy it is underwatered, if the leaves are turning yellow it is overwatered.  Many plants like to have the soil dry out completely between waterings.  This means when plants are watered, they should be watered until water starts coming out of the bottom holes to ensure that water got to the very bottom. 

_Having enough lighting is also extremely important, and the most difficult thing to achieve indoors.  Indoor light levels are really crappy.  Even a space we think is quite brightly lit, is actually fairly dim compared to the outdoors.  From the book:

INDOOR SPACES;
reading/writing - 20 footcandles
ironing/sewing - 40 footcandles
circulation areas - 10 footcandles
display areas - 100-200 footcandles
conference room - 30 footcandles

OUTDOOR SPACES:
cloudy winter day - 2,000 footcandles
sunny summer day - 10,000 footcandles

So you can see that typical indoor lighting isn't nearly sufficient for plant growth.  Light has to be introduced in some way.  I have a high-efficiency fluorescent grow light with 4 tubes and that has worked so far for what I am growing.  Fluorescent lights are an inexpensive way to add a lot more light to the space.  Reflectors are another way to utilize the existing light more efficiently.  By using mirrors, reflective metal surfaces (panel covered in aluminum foil) or white surfaces, more light can be reflected back onto the plants.  According to tests conducted at the Rodale Experimental Farm in Emmaus, Pennsylvania, white is a better reflector than metal surfaces. 

_Proper drainage is another important aspect.  As I mentioned above, it is bad for plants to be sitting in water (even a little bit at the bottom).  To avoid this, fill drainage trays with rocks and set plants on top so the water can drain, but the plant doesn't have to sit in the overflowing (standing) water.

All in all, in a post-cheap oil house, it would be ideal to have a dedicated space for growing food.  This space would ideally be a greenhouse space attached to the house so no additional light would have to be introduced.  It could be enclosed by reflective walls (mirrors or white) and have zones for various temperatures/humidity.  This way, plants which are typically grown in tropical regions could grow in one part of the space, while other plants needing less sun/heat could be grown in another part of the space.   Ample room for storage would be required.  The table could be a large tray covered in stones which would serve as a giant drainage space (or possibly just drain onto the floor).  This space could be heated passively by having glass angled perpendicularly to the noon-sun angle (at the coldest time of year).  The space would be a pleasant place in be on a cold, winter day in MN :) and excess heat could be introduced into the living space as needed.

Sunday, September 26, 2010

DAY 41_GNATS

24 September 2010

Gnats have infested our house.  They don't seem to be coming out of the worm bin when I open it, but they were definitely attracted to the kitchen compost tin we had sitting on our counter.  While the kitchen composter had carbon filters to prevent odors, it isn't air-tight, so the fruit flies (which apparently have a great sense of smell) could smell it and get in.  While we stopped using the kitchen composter and are throwing food scraps directly into the bin now, the fruit flies have made homes in the houseplants and want to stay.  This article explains that there are two kinds of gnats that are typically problems with houseplants and worm-bins.(http://www.mass.gov/dep/recycle/reduce/flies.htm) This article: (http://www.redwormcomposting.com/worm-composting/fungus-gnats-in-worm-compost-bins/) is also a good resource.

Fruit Flies are a little larger, have reddish brown bodies and can often be seen hovering around bowls of fruit or juice.  The gross part is that fruit flies often become a problem because they the larvae are actually inside some of the fruit that you bring home (cannot be seen by the human eye).  They are especially attracted to bananas because of their strong smell.  If fruit that contains larvae gets thrown in the worm bin, it now has the perfect little habitat to thrive. 

The other kind of gnats (I think we have both at our house) are Fungus gnats.  These insects are attracted to houseplant soil and burrow in.  You can often see them around plants or on the underside of leaves.  These can be a particularly dangerous problem to seedlings as they eat the delicate roots of young plants and case disease or die.  The houseplant in our bathroom has a lot of gnats at this point. 

War on gnats. Here is the plan:

Step 1: place sticky traps around areas where gnats are found  I have hung one in the bathroom next to the plant, but it doesn't seem to be doing much.)

Step 2: make gnat traps.  By placing apple-cider vinegar in a small bowl (they are attracted to the fermenting smell) and making a funnel with a small hole at the end, the gnats crawl inside the trap and it is virtually impossible for them to get out.  They drown in the cider. 

Step 3: allow plants to draw out between watering, the fungus gnats

Step 4: while fungus gnats burrow into compost and can be eliminated by opening the bin to the light for a day, the fruit gnats are attracted to the smell of the compost, so opening it would likely solve one problem and create another.  By keeping a layer of soil on top of the compost, the smell won't be attractive to the gnats.  I dig a hole in the bin to put food into and bury it.  Also, by over-feeding the worms gnats are attracted to the smell of food that is rotting (because the worms can't keep up).  

gnats on bathroom mirror

sticky tape

DAY 40_BULK SHOPPING + FROZEN FOODS

23 September 2010

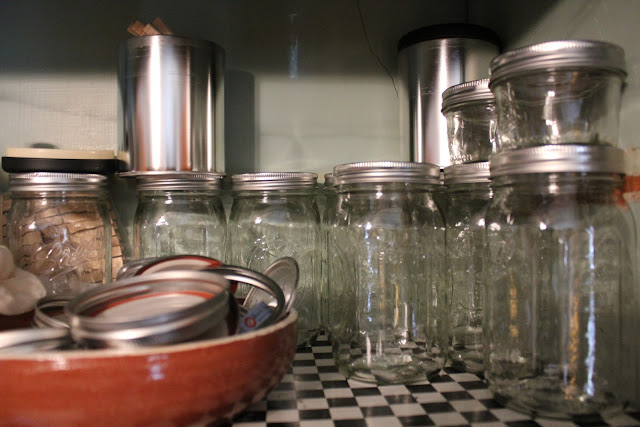
I want to dedicate a post to bulk food buying and storing.  This is a really simple thing, but something that has completely changed the way I shop, cook for myself and my diet.  While I bought in bulk before this project (haha seems SOO long ago), I hadn't ever adopted bringing in my own jars to fill.  Part of the downside of this is you have to (1) remember your jars, (2) you have to go home and get your jars, so it makes it more difficult to run to the grocery on the way home from work/school.  Regardless, if I were buying in ALL bulk, I probably would have realized that having tons of plastic bags with twist-ties around the in the cupboard wasn't exactly the most efficient way of storing food.  I am now the proud owner of 48 mason jars (plus a few)!  You need a variety of sizes to use cupboard space efficiently and not have to carry more jar around than you need on trips to the grocery store.

Here is the breakdown:

_12 half pint jars (yeast, dips, spreads, butters, portable containers for sauces/food)
_12 pint jars (baking soda, beeswax, make good drinking glasses, good size for leftover sauces)
_24 24 ounce jars (wild rice, flax seed, maple sugar, salt, nuts)
_3 64 ounce jars (I keep 'other' flours in these and crackers)
_2 huge jars (pasta, all purpose flour -I go through a lot of this)

When you bring in a jar to the co-op, weigh it first and write down the weight (ex. TARE 0.64 lbs).  Fill with whatever bulk ingredients and write the number (usually 6 digits on container) on another sticker for the jar.  You don't have to weigh it after you fill it.  At checkout they simple subtract the weight from the TARE and charge you that. 

By buying all the same kind of jars, they are easily stack able in the cupboard and you have use space more efficiently.  For anything that doesn't come in bulk bins (produce), you don't need a bag for these either!  I think some people must think it is gross to just throw the produce into the basket and then put it directly on the belt when checking out.  OR, people think that the checkout would PREFER that you bag things.  This probably isn't the case because they have to find the sticker and count the number of items in each bag, which is more difficult when in bags. Produce certainly doesn't go directly from a plant to the grocery bin. Lets consider for a moment how many different surfaces your produce has touched before it go to you:

(1) hands picking produce at harvest
(2) hands and boxes sorting produce
(3) hands and boxes for shipping
(4) hands and boxes for storing
(5) hands and grocery surfaces (maybe even the floor if dropped) when placing in display bins for purchasing
(6) LOTs of hands picking through produce at the store

So, maybe it isn't such a big deal if that tomato isn't wrapped in plastic to go from the bin to the checkout-and, it will save you a bag.

I have bowls inside my cupboard for produce that isn't refrigerated (potatoes, garlic, shallots, apples).  And bowls inside my refrigerator to organize food in there (peppers, tomatoes...) I keep my greens in a vase of water on the counter (they last longer this way, don't take up space in the refrigerator and make a pretty little rotating green bouquet on the counter :)
plastic bags provided at co-op in bulk section (not being used in this project)
non-refrigerated produce in bowls
flours
spice/herb jars
extra jars
huge jar!

bulk mason jars

FROZEN FOODS:
The weather is getting colder, I've been surprised to see how many greens and vegetables are still available at the farmer's markets and the co-ops.  I can still find local: garlic, tomatoes chard, kale, basil, and lots of different kinds of peppers.  The 'fall' crops are probably going to be around for a while (potatoes, squash, apples).  However, because I don't know when things will start to disappear, I've started to freeze things that I'm scared about :/

So far I've frozen:
_made a large batch of pesto and frozen it it into muffin cups for single servings
_frozen pears (which are now gone)
_frozen hot peppers

Things that are gone for good:
_fresh herbs (except basil which reappeared a few days ago after being gone for a week)
_spinach
_berries
_melons
_corn
_beets
_cucumber

Things that are here to stay :) (not dependant on season)
_milk
_sunflower oil
_cheese
_flour? grains?
_dried herbs
_nuts?
_sugar
_maple syrup

I will hopefully be able to harvest my first greens in the next few weeks. I have a small herb garden that probably won't be ready for a while (cilantro, rosemary, basil and lemon balm). 

frozen in masons

pesto frozen in muffin tin, then placed in hot water (only for a second) to get loose

Friday, September 24, 2010

DAY 39_LOCAL FOOD DINNER

22 September 2010

As a kick off meeting for our student-run architectural sustainability group at the University of Minnesota (Greenlight), my friend Amber and I cooked a massive amount of amazing local foods.  The ingredients for the entire dinner were bought in bulk, locally produced and organic.  (yes, I biked over in the pouring rain with all my mason jars of ingredients. win.). In keeping with my project requirements, we composted all organic waste and bought beer in growlers to eliminate any glass recycling 'waste'.  I mentioned before, a new cultural Minnesota cuisine that will inevitably emerge without cheap, abundant energy to transport foods, maybe some of these foods would be a part of that?  It was really interesting to see how to make many things-such as the crackers-which have only a few ingredients.  Many of the foods I eat everyday from packages are SO easy to make, and much better (and more healthy) when fresh. 

As promised, here are all the recipes for the dishes we made:

CRACKERS:
1 1/4 cups flour; white, whole wheat, rye*
1/2 teaspoon salt
2 tablespoons butter, or sunflower oil
4 tablespoons water; add more as needed
1 teaspoon seasoning such as chili powder, dried herbs etc (optional)

Container: baking sheet
Prep Time: 15 minutes
Cook Time: 15 minutes

Preheat oven to 400° F.
Mix together well, preferably in a food processor, 1 cup of the flour, 1/2 teaspoon salt and oil or butter ( use smaller amount for crisper crackers, or a larger amount for a richer flavor). Add 3 tablespoons water and mix well. Gradually add more water, mixing after each addition, until mixture forms a compact ball. If it seems too sticky to handle, add more flour.
Sprinkle a work surface (or a baking sheet-sized piece of parchment paper) with some of the remaining flour then press and roll the dough to about 1/8th inch thick. Try to get it fairly uniform. If the dough is too dry to roll out, return it to the food processor and add a little more water. If necessary to prevent sticking, dust your hands and the rolling pin with a little more flour.
Put the rolled-out dough on a baking sheet dusted with a little flour (if you've used parchment paper, transfer dough and paper to baking sheet) and bake 10 - 15 minutes, until somewhat brown.
Cool and break into pieces. If making several batches, mix another while the first one bakes. You can re-use the parchment paper several times.
*Any finely ground grain such as cornmeal or buckwheat can be used for the flour in this recipe.


EGGPLANT WITH GARLIC, BASIL and TOMATO
1 large eggplant
1/2 cup sunflower oil
6 tomatoes
4 cloves garlic
basil

1_prepare eggplant: soak eggplant in water, drain water and salt, rinse salt off, place in a baking pan and drizzle liberally with olive oil
2_bake eggplant at 350 for 20 min, flip, 20 min more on other side
3_saute chopped garlic, basil and tomatoes in a sauce pan for 20 min
4_pour over eggplant mixture and serve


ALFREDO SAUCE
1 1/3 cups milk (Cedar Summit)
1 garlic clove
2 tbsp all purpose/white flour (Whole Flour Milling)
2 tbsp cream cheese (Swiss Valley Farms)
1/2 cup grated Parmesan cheese (Sarvecchio)

chop and mix all ingredients in either; a blender (then heat until warm over stove), directly on the stove


SPICY TOMATO SAUCE
4 tomatoes
2 tbsp cream cheese
1/2 tsp salt
1/2 tsp dried basil
1 garlic clove
1/2 jalapeno pepper

chop all ingredients well and mix over stove, let simmer for 30 min.


CRANBERRY NUT BREAD
1 1/2 tsp baking powder
1/2 tsp baking soda
1 tsp salt
1 cup whole wheat flour (Whole Flour Milling)
1 cup white flour (Whole Flour Milling)
1 orange (not local :/)
1/4 cup sunflower oil
1 cup maple sugar
1 large egg
1 cup cranberries (Wisconsin)
1/2 chopped walnuts

1_preheat oven to 350, oil a 8.5"x4.5" bread loaf pan
2_combine baking power, baking soda, salt and flour in a large-sized mixing bowl. set aside
3_place orange, oil, sugar and egg into a blender or food processor, blend for 35 seconds
4_pour wet mixture into dry ingredients, mix until ingredients are just moistened
5_gently stir in cranberries and chopped walnuts
6_spread the batter in the prepared loaf pan, bake for 60 min, or until a knife inserted into the center comes out clean


GARLIC BUTTER:
2 cups heavy whipping cream
1/8 tsp salt
1 garlic clove
3 tbsp fresh snipped chives
(makes 1 1/2 cups)

1_place cream in a blender
2_blend on high speed until mixture is thick and you hear a change in the sound of the machine and it no longer mixes
3_stop machine and scrape down the sides of the container with a spatula to bring ingredients to the center of the container
4_blend on medium speed for 5 seconds and repeat steps 3 and 4 until solid butter starts to set up in the center of the container and mixture starts to flow easier
5_add garlic clove and chives and blend for 15-30 sec
6_place butter in a fine strainer to drain
7_remove butter to a bowl and add salt to taste, work butter with a spatula to remove as much liquid as possible

HAZELNUT BUTTER
2 cups (9 oz) roasted hazelnuts
1/2 tsp salt
3/4 tsp maple sugar
1 tbsp sunflower oil
(MAKES 1 CUP)

1_roast hazelnuts (at 275 for 20-30 min) until skins crack and meat turns light golden
2_combine roasted nuts and oil into a high powered blender or food processor and grind to meal consistency
3_continue to blend on low for several minutes (add another tsp of oil if necessary)
4_gradually add other ingredients and blend on low until thoroughly mixed to desired consistency


LOCAL PESTO, VEGGIE +MOZZARELLA PIZZAS
DOUGH:
1 1/2 cups water
2 tbsp sunflower oil
2 tsp maple sugar
4 cups bread flour
4 tsp active dry yeast

mix in a bread machine or knead by hand

1_let rise in a warm place for 30 min
2_push bread into bread pan and let rise for another 30 min
3_add pesto and cherry tomatoes, peppers, homemade mozzarella cheese and garlic
3_bake for 20-25 min on 350

BUTTERNUT SQUASH DIP
2 cups cooked butternut squash
3 tbsp sunflower oil
1 head garlic, roasted, cloves separated
8 ounces goat cheese
1 lemon, peeled, halved, seeded

1_halve squash, remove pit/seeds and place in a baking dish with 1 inch of water to cook at 350 for 1 hour
2_separate garlic cloves and roast on a baking sheet (with peels still on) for 30 min
3_Either place all ingredients in a blender/food processor or chop and heat over med heat for 20 min

CHEESES SERVED: Prairie Breeze (white), Widmer (yellow)
BEER: Town Hall Microbrewery (seven corners), both Oat Amber and Abbey growlers


HOMEMADE FETTUCCINE
1/4 cup semolina
1 1/2 cups flour (white)
3 eggs
1/2 tsp salt
1 tbsp sunflower oil

1_knead by hand until forms smooth ball
2_cover w/ damp towel and let sit for 30 min
3_roll thinly and either use pasta machine or cut by hand

*cook fresh pasta for only 1 minute
*fresh pasta can be dried or refrigerated for up to 3 days


APPLE CRUMB
MIXTURE:
4 apples
1 tbsp maple sugar
1/2 cup water

TOPPING:
1/2 cup maple sugar
3/4 cup flour
1/2 cup butter

1_cube apples and mix with water and maple sugar, pour into baking pan
2_mix topping ingredients until crumbly
3_sprinkle topping on apples in pan
4_bake for 30 min on 350


DAY 38_CAT ON COMPOST+WORMS ON FLOOR

21 September 2010

Quille (the cat) has taken a liking to the compost.  She started sniffing it out a few days ago, we thought she might have been hearing the worms inside (you can hear them moving around if you listen really closely). 

What started as sniffing turned into a mysterious indentation found on the compost each morning.  The compost is covered with a cloth sheet to allow for ventilation and bungeed down around the edges.  I finally caught her using the compost as a hammock a few days ago.  I think she likes it because it is comfortable (suspended) and is warm.  The compost is actually getting large enough that is creates some heat as it decomposes.

Regardless, cat on the compost isn't an ideal situation, one of these days she might actually fall in which might end up in compost catastrophe (or at least a mess).  The solution to this was to replace the rubber lid on the compost again.  It is easier to get in and out of the compost this way (don't have to undo bungees every time) and there is less quille vs compost danger.  I am planning on drilling some holes into the lid and sides to allow for ventilation again and hopefully won't run into the same mold problems I had. 

The other reason for putting an easier-to-get-to lid on again is we have been infested with little gnats.  Part of this I'm guessing is due to food sitting in the kitchen composter for a day or two before being added to the bin.  The kitchen composter has a charcoal filter which eliminates odors but is not air-tight so bugs can still get in.  The new plan was to have my roommates dump scraps directly into the bin, and, once a day I will dig a hole in the bin and bury the compost.  When the food isn't exposed to air, gnats are not attracted to it.  Hopefully, this will be a better solution than putting food in the garbage even because it will (almost) always be buried in worm dirt and pests won't be attracted to it.

I had the rubber lid on top (no holes yet) for a few days and today came home to find that worms were trying to escape!  John Steingrabber (compost expert from previous post) had mentioned to me that he sometimes ends up with worms on the floor as well.  He explained that the worms try to avoid light but aren't really smart enough to tell where the light is coming from.  Now that the whole bin is really dark inside the worms have begun to climb up the sides of the tub and are ending up (for whatever reason) on the outside of the tub. 

I noticed this the first day with the lid on, but the worms escaped in full force today.  My roommate Karli was the first one of us upon the scene.  She heard Quille meowing like a crazy cat and came in the kitchen to investigate.  According to Karli "there were handfuls of worms all over the floor!"  They had bunched themselves up into clumps or balls of worms and were all over the floor and on the outside sides of the tub.  Karli wins a gold start for saving the worms which hadn't dried up yet, and trashing the ones who were already dead from being too dry.    By the time I came home that night there were, again, worms on the sides of the bin and a few on the floor, and the handles of the bin were FULL of worms.  Why are they doing that?  I only found out later that the worms had been much worse than what I saw. Gross.

We can't really put the bin outside because the worm's won't survive under 55 degrees, and it is much more convenient to have it in the kitchen.   I am going to try some different scenarios of drilling holes in the lid and sides to see if it deters worms from climbing up the bin.  On the one hand, the space should be dark enough that worms go to the top of the compost.  This would minimize the amount of stirring that needs to happen.  On the other hand, there needs to be enough light to let worms know not to go there. 

This is really a design problem.  Kitchens in an era where waste is too expensive/energy intensive to haul away in large quantities will demand that organics be dealt with within each building.  This wouldn't be a difficult thing to accommodate if it was built into our homes as a separate and dedicated space.  Because worms are afraid of light, they can be contained by having strips of light at the borders of the 'compost space'.   The space would need to be adjacent to the kitchen for easy access and would need to be conditioned so it wouldn't get too cold or hot.  It would be interesting for this space to serve as a 'bridge' between the grow table area on one side and the kitchen on the other.  Organic food scraps go in on the kitchen side, are composted by worms, and come out as finished compost which can be mixed to create rich, nutritious soil on the grow table side.  Designing in this way makes the hypothetical cycle waste to food to waste an actual physically built part of the house.  Incorporating the changing activities of homes in a post-cheap-petroleum world accommodates these activities in an effortless manner, similar to turning on the tap or pulling your car out of the garage. 


Wednesday, September 22, 2010

DAY 37_FRESH PASTA (CULTURAL CUISINE IN A POST-CHEAP OIL WORLD)

20 September 2010

While I recently discovered a 'local' pasta (actually from North Dakota, but defined as local at the grocery co-op), a friend and I decided it would be interesting to make our own.  She has a hand cranked pasta maker that can make spaghetti and fettuccine, we opted for the fettuccine.  We realized quickly that pasta making is (1) not a one or two person job but needs MANY hands, and (2) takes a REALLY long time.

The recipe we used for fresh pasta:

1/1/2 cups white flour
1/4 cup durum semolina flour (recommended to use a 1:4 ratio of semolina to flour when first starting)
3 eggs
1 tsp of salt
(makes about 4 servings)

This is a really dense, tough dough, hard to mix, but once it is mixed it can be rolled extremely thin and pulled without breaking (that's the semolina's job).  We rolled it out to create something that looks like a cows tongue (pictured) and then went to the machine.  The machine has 9 settings of thinness, you start at the widest setting (9) and put the pasta through over and over until it is really thin.  The length of our dough got bigger as it got thinner until it was about 3-4 feet long, when we would cut it in half or thirds before putting it into the fettuccine cutter. 

Once cut, the pasta has to be separated slightly and dried.  Fresh pasta is usually made with eggs and can last only 3 days if refrigerated.  Dry pasta is not simply fresh pasta that has been dried, it is made without eggs, making it really hard to make by hand and probably best left to industries with specialized machinery.  Dry pasta can last up to 2 years. 

Once we finished the pasta making and everything was on racks to dry (including my clothes drying rack) we made about half of it (we had doubled the recipe).  You only need to cook the pasta for 1 minute when it is fresh. It is already soft.  This guy has some rules about pasta cooking: http://www.skilletdoux.com/2006/02/the_ten_command.html

We made a fresh Alfredo sauce with cream cheese, Parmesan cheese (both local), some garlic butter I made before and milk.  SUPER good.  The fresh pasta absorbs the cream sauce and makes it delicious (and really fresh tasting).  Tons of work, but, in the end, really fun to make with a bunch of people.

Making pasta made me think about the traditions behind cuisines that exist around the world that revolve around many people cooking food for a long time.  Pasta is obviously a tradition central to Italian culture, it is actually written into their laws how to properly make pasta.  This article talks about the history of eating and how various cultural cuisines came about. (http://www.unu.edu/unupress/unupbooks/80632e/80632E02.htm)

"Ecologic and economic studies within anthropology have considered the relationship of food choices to the foods available in particular environments. Biocultural anthropologists have tried to show how cultural habits, including food beliefs and practices, affect the biological well-being of human populations or social groups in the short run and the evolution of human biological populations in the long run. Conversely, biocultural anthropologists have also attempted to determine the relationships between biological aspects of particular environments or genetic characteristics of particular populations and their cultural beliefs and practices, in order to show interactions and interrelationships between biology and culture over both the short and the long term."

The reasons we eat what we do (and the reasons so many different cultural cuisines exist) are not arbitrary, but evolved out of; what foods were available in each region, economic factors, medicinal properties of food, taste standards....Like I mentioned in an earlier post about Indian foods, their traditions of eating food are based on how to prepare food in a tropical climate to kill bacteria and keep it from going bad.  It was mentioned to me before that the most healthy way of eating is to eat within a particular cultural cuisine because each cuisine has gone through thousands of years of trial and error to end up with a diet that is very nutritionally complete. 

This is interesting to think about in a post-cheap-oil context because our 'traditional cuisine' in America is a mixture of HUNDREDS of different cuisines.  This 'mixing' of cuisines allows us to enjoy foods from cultures around the world and make them our own, however, it disconnects us from the reasons for eating each of the foods we do.  The ability to transport food from around the world easily has completely changed our diet and ideas of what is traditional food.  I would imagine that in a era without cheap transportation fuels, new, adapted versions of cultural cuisines would reappear.  Only being able to eat local foods, people would be more connected to what can be grown in their particular region and design their diets around those ingredients. 

Doing this project, I feel as though I am unraveling what this new Minnesota climate cultural cuisine will be.  Although this diet this is influenced by traditional Midwestern cooking as well as Native American foods (because both diets were built around what was available locally), the post-petroleum cuisine will be a hybrid between those cuisines and a new cuisine which is influenced by our time spent eating cuisines from all over the world and learning from them.

Tuesday, September 21, 2010

DAY 36_LOCAL FOOD RESTAURANTS-GALACTIC PIZZA

19 September 2010

There are TONS of restaurants in Minneapolis which offer local foods.  However, the definition of 'local' is slightly different at each, and it varies quite a bit how local the restaurants go.  For example, many 'local foods' restaurants simply give preference to local foods while they are in season. Some offer local foods in almost all dishes, but the entire dish isn't local (all ingredients).   I have yet to find a restaurant that is ENTIRELY LOCAL all the time, or one that uses sunflower oil instead of olive oil.  This would require the restaurants to freeze, dry, can and preserve foods in a way which is often less desirable their patrons.  People would rather eat fresh especially when eating out, and I would assume that restaurants would shy away from preserving foods simply to give themselves a 'year-round-local' title.  Here is a list I have so far of restaurants in Minneapolis that offer local foods (at least part of the year, in SOME of their dishes)

_Local D'Lish (localdlish.com‎)
_Crema Cafe (cremacafeminneapolis.com‎)
_Red Stage Supperclub (redstagsupperclub.com‎)
_Common Roots Cafe (commonrootscafe.com‎)
_Birchwood Cafe (birchwoodcafe.com‎)
_Galactic Pizza (http://www.galacticpizza.com/)
_Spoonriver (spoonriver.com‎)
_Alma (restaurantalma.com‎)
_Brasa Premium Rotisserie (brasa.us‎)
_Lucia's Restaurant (lucias.com‎)
_Craftsman Restaurant (www.craftsmanrestaurant.com)
_Heartland (www.heartlandrestaurant.com)

This list is by no means exhaustive, and I would appreciate any other suggestions of places I should check out!

In order to figure out which restaurants offer the most 'local' food for the longest period of the year I am trying to visit many of the Minneapolis restaurants claiming to be 'local'.  Today, we ended up at Galactic Pizza, the self-proclaimed "Planet Saving Pizza" of Uptown, Minneapolis.  This is their vision:

"At Galactic Pizza we have a positive vision of the future on our planet. We see a world that lacks the greed and self centeredness that has led use into the chaotic state that we see today. We see a world full of cooperation, sustainability, and harmony with our surroundings.
In order to help achieve this positive vision, we strive to be the perfect example of what is called a values led company. This means that we realize that we have a responsibility to the people and community that make our existence possible. In order to fulfill this responsibility, we seek to maximize our impact by integrating as many socially beneficial actions into our day to day operations as possible. By incorporating a concern for the community--local, national, and global--our restaurant can make positive impact on the world in which it operates."

This place is 3 blocks away from me, and is pizza, so that's good. They have all kinds of sustainability-minded initiatives going;
_deliveries in 100% electric vehicles,
_all power purchased to run the restaurant in wind energy,
_many organic options,
_use packaging that is either made from recycled materials or is 100% biodegradable (compostable), you can return your pizza boxes to them to be composted!,
_when in season purchase all of the produce from local Minnesota farms, composting food waste

So that is great, in general, without oil these guys would be pretty well off since the entire infrastructure of their business is more or less oil free; renewable energy, electric cars, composting waste and reusable/compostable packaging, local foods. 

We had the Paul Bunyan Pizza, according to the menu: "This is a very special pizza. The first of its kind. All of the toppings have been selected based on the fact that they are native to the Minnesota ecosystem, giving it a unique flavor that is truly Minnesotan. It starts with our homemade tomato sauce, topped with mozzarella cheese, morel mushrooms, wild rice, and free range bison sausage."

They also offer a few other all-local pizza's, CSA pizza which changes weekly as they get different produce in their CSA box...

They also dress up like super heros. yes.

TEN REASONS TO EAT LOCAL FOOD (http://fogcity.blogs.com/jen/2005/08/10_reasons_to_e.html)


DAY 35_PASSIVE HOUSE IN THE WOODS

18 September 2010

http://www.passivehouseinthewoods.com/

We went to tour the Passive House In The Woods today, which is located in Hudson, Wisconsin.  Yes, I had to drive there :/  First time in a car in 35 days.  But don't worry, we carpooled.  The house is a 3-bedroom, 3 level 1,940 square foot house with a rooftop terrace and many walk out balconies facing into the woods.  It is located on the edge of a cookie-cutter suburban neighborhood.  While the view from the house shows the St. Croix river valley, you have to look past all the rest of the suburban development first, which makes for an interesting contrast of building types.  We thought it should have been called Passive House in the Suburbs ;).  It was designed by a design team at TE Studio

According to their website, "The project is designed to the Passive House Building energy standard, which currently represents the tightest energy standard in the world. Passive House in the Woods actually exceeds space-conditioning requirements for Passive House by 25%.  Currently, there are a little over one dozen certified Passive House™ buildings in the U.S. The Passive House in the Woods is slated to become the first certified Passive House™ in Wisconsin, and one of only a few net energy positive and carbon-neutral buildings in the country."

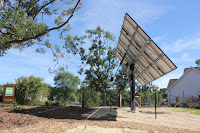
The main idea for this kind of Passive House  (capital P)  is its high performance building envelope.  By super insulating with 12" of Polystyrene and 11" of Insulated Concrete Forms, the entire building envelope can dramatically reduce the amount of energy used to condition a building.  The walls have an insulation value of R-60 and the roof R-95.  The mechanical system in the house is heat-recovery ventilation, which pre-heats and pre-cools the incoming air.  Because the house has such ridiculously high insulation values, hardly any heat is allowed to escape once introduced into the space.  Electric in-floor heating mats take care of the rest of the heating, no boiler, no furnace.  While not required by the Passive House standards, the Passive House in the Woods also has two solar arrays which cover the entire electricity need and make the house net-energy positive (sells money back to the grid).  It is a 4.7 kW array which (with 4.6 hrs of peak sun in MN) I'm guessing produces about 21 kWh/day (643.6 kWh/month).  For comparison, the electric bill for my 3 bedroom house is around 180 kWh/month  (granted, the Passive House is 3 levels).  There is also a 40 square foot solar hot water collector on the roof.

It was interesting to walk through the house with my roommate Abby who designed and built a passive house (lower case p) for her parents in Alberta.  The philosophies behind the house she built and the Passive House standards(http://www.passivehouse.us/passiveHouse/PHIUSHome.html), demonstrate quite different approaches to sustainable and 'passive' building.  She designed her parent's house to have a long east-west axis with the south face oriented to the sun.  The entire south side has large expanses of windows which capture the solar energy which is stored as heat as it hits the massive concrete slab floor inside.  The BACKUP system is a geothermal radiant floor system.  It's a beautiful house which is more or less symmetrically divided to have two wings, one for her parents and one for her aging grandparents who recently moved in. 

While the Passive House in the Woods has south exposure, it seemed a bit misleading to claim that was a 'passive' feature of the house because there was no thermal mass to capture any of this solar heat/light.   The primary heating source was in-floor heating mats, and the heat recovery ventilation.  The super insulation part could definitely qualify as a "passive" system, but the rest of the systems were what I understand as "active" systems (mechanical additions to the space in the form of the Heat Recovery Ventilation, heating mats, and solar array).  In the same way, we could criticize Abby's house as not being entirely passive because it had the geothermal radiant heat.  However, Abby's house had active systems only as a backup, with the primary heating system being the passive solar energy gained through the south facing windows and stored in the concrete floor.  I'm not sure 'passive' is the right term for the method of building demonstrated in the Passive House in the Woods. 

Another thing to note is that Polystyrene is a petroleum product.  While there are many other options for insulation in buildings, how will super insulation occur without this product? What other products could be used in a post-cheap oil world to carry on this type of building? 

I'm not sure, but its seems that if a truly 'passive' system could be achieved (designing a home to capture and take advantage of the free energy resource of the sun-THAT would be a better goal than relying on the efficiency of building materials such as polystyrene super insulation + mechanical systems.